Fun Kitchen Activities for Kids- Little Chefs Learn
Kids in the kitchen activities are more than just a way to fill a rainy afternoon; they’re a recipe for unforgettable memories and essential life skills! We all know the joy that comes from seeing little hands enthusiastically stir, measure, and decorate. It’s that spark of pride when they present their culinary creation, a delicious masterpiece born from their own effort. What makes these kids in the kitchen activities so special is the tangible outcome – a tasty treat you can actually enjoy together! Unlike some crafts that end up in a dusty corner, these experiences result in edible rewards. It’s about fostering independence, teaching them about nutrition and where food comes from, and building confidence, all while having a blast. Get ready for some seriously fun and flavourful adventures with our curated selection of engaging kids in the kitchen activities!

Kids in the Kitchen: Activities Edition
Welcome to a special edition of our cooking adventures, where we’re focusing on fun, engaging activities to get your little chefs involved and excited about being in the kitchen! It’s not just about the delicious results; it’s about the process, the learning, and the memories we create together. Today, we’re diving into some fantastic kitchen activities designed to spark creativity, develop fine motor skills, and foster a love for food. Forget complicated recipes for a moment; we’re focusing on the *doing*!
These activities are perfect for a rainy afternoon, a weekend project, or even as a way to introduce young children to basic kitchen concepts in a playful manner. We’ll be working with simple, readily available ingredients that lend themselves well to hands-on exploration.
Getting Started: Safety First!
Before we begin any kitchen adventure with kids, it’s crucial to establish some basic safety rules. Always supervise young children closely. Make sure they understand not to touch hot surfaces, sharp objects, or appliances without adult help. Wash hands thoroughly before and after handling food. Designate a “kid-friendly” workspace where they can feel comfortable and have plenty of room to move.
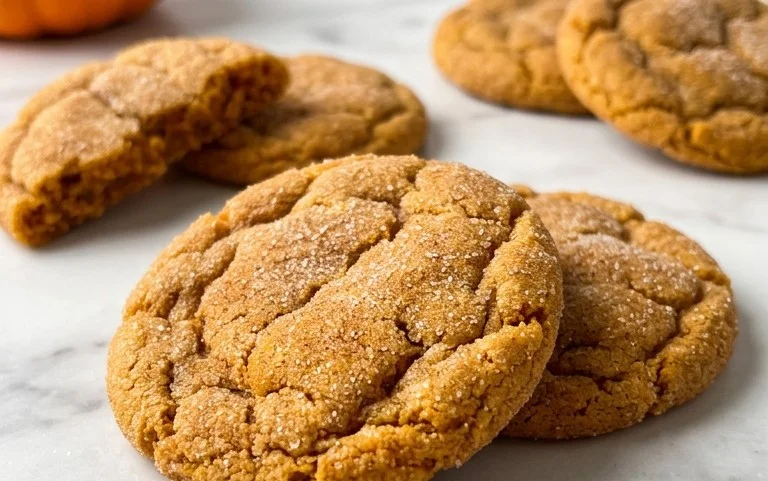
Activity 1: Decorate Your Own Cookies (or Biscuits!)
This is a classic for a reason! It’s incredibly versatile and allows for endless creativity. We’re going to focus on the decorating aspect, using pre-made plain cookies or biscuits as our canvas.
Ingredients:
- Plain sugar cookies or store-bought biscuits
- Assorted sprinkles (jimmies, nonpareils, sugar crystals)
- Edible glitter
- Small candies (M&Ms, mini chocolate chips, nonpareils)
- Pre-made frosting in various colors (or make your own simple buttercream)
- Piping bags with small tips (optional, for more controlled decorating)
- Small bowls for holding decorating supplies
Decorating Instructions:
1. Prep the Workspace: Lay out a large, easily wipeable surface or a disposable tablecloth. Divide your decorating supplies (sprinkles, candies, glitter) into small bowls. This makes it easy for little hands to access everything and minimizes mess. If you’re using pre-made frosting, you can spoon it into smaller bowls for easier dipping and spreading, or load it into piping bags for more precision.
2. Frosting Fun: If using frosting, this is where the real fun begins! Provide kids with a butter knife or small spatula to spread the frosting evenly over their cookies. Encourage them to experiment with different amounts of frosting, from a thin coating to a thick, fluffy layer. For younger children, simply spreading the frosting can be a great sensory experience.
3. Sprinkle Mania: Once the frosting is applied, it’s time for the sprinkles and candies! Let them go wild! Encourage them to create patterns, mix colors, or simply cover the cookie entirely. This is a fantastic way to develop fine motor skills as they pick up and place individual sprinkles. For a more controlled approach, you can have them dip the frosted cookie into the bowls of sprinkles.
4. Edible Art: Encourage them to use the candies to create faces, shapes, or scenes on their cookies. Mini chocolate chips can become eyes, M&Ms can be mouths, and edible glitter can add a magical sparkle. Don’t be afraid to let their imaginations run wild! There are no rules here, only delicious creativity.
5. Admire and Enjoy: Once decorated, carefully place the finished masterpieces on a plate or baking sheet. Take a moment to admire their handiwork before they get devoured! This activity is all about the process, so celebrate every colorful creation.
Activity 2: Edible Playdough Creations
This activity taps into a child’s natural love for playdough, but with a delicious twist! It’s a safe way for even the youngest chefs to get hands-on with food preparation.
Ingredients:
- 2 cups all-purpose flour
- 1 cup salt
- 2 tablespoons cream of tartar
- 2 tablespoons vegetable oil
- 1 cup cold water
- Food coloring (various colors)
- Optional: Flavored extracts like vanilla or strawberry for scent
Edible Playdough Instructions:
1. Dry Mix Assembly: In a large bowl, combine the flour, salt, and cream of tartar. Whisk them together thoroughly to ensure there are no clumps. This is a great step for older children to help with, as they can practice measuring and mixing dry ingredients.
2. Wet Ingredients Introduction: In a separate bowl or measuring cup, whisk together the vegetable oil and cold water. If you’re using any flavored extracts, add them to the wet ingredients now and give it a good stir.
3. Combining and Cooking: Pour the wet ingredients into the dry ingredients. Stir with a spoon until a thick dough forms. Then, transfer the dough to a non-stick saucepan over medium heat. Cook the dough, stirring constantly, until it thickens and forms a cohesive ball that pulls away from the sides of the pan. This process might take about 5-8 minutes. Constant stirring is key to prevent burning and achieve the right consistency.
4. Coloring and Kneading: Once the dough is cooked and has cooled slightly (it should be warm but not hot to the touch), divide it into portions based on how many colors you want to make. Add a few drops of food coloring to each portion and knead until the color is evenly distributed. This is the most engaging part for kids! They get to see the dough transform before their eyes. You might need to wear gloves to avoid staining your hands if using vibrant food coloring.
5. Creative Sculpting: Once your edible playdough is colored and cooled, it’s ready for sculpting! Provide cookie cutters, small spatulas, rolling pins (even toy ones work well), or just let them use their hands to create shapes, animals, or anything their imagination can conjure. They can even eat their creations! This activity encourages sensory exploration, imaginative play, and fine motor development. Remember, while it’s edible, it’s not intended as a meal!
These activities are just the beginning of a world of kitchen fun with your kids. The most important ingredient is always a healthy dose of patience, encouragement, and a willingness to embrace the mess! Happy cooking!

Conclusion:
These Kids in the Kitchen: Activities Edition recipes are fantastic for so many reasons! Not only do they provide delicious and fun results, but they are also designed to be engaging and educational for young chefs. We’ve focused on simple steps, safe techniques, and ingredients that are readily available, making them perfect for families looking to spend quality time together while fostering culinary skills. These recipes are a wonderful way to introduce children to the joys of cooking, build their confidence, and encourage healthy eating habits.
For serving, get creative! These dishes are perfect for a fun family dinner, a special weekend brunch, or even as a potluck contribution for a kids’ party. Think vibrant platters, fun plating ideas like smiley faces, or even letting the kids decorate their own creations. Don’t forget to encourage variations! Feel free to swap out vegetables, experiment with different herbs and spices, or even add a dash of your family’s favorite sauce. The possibilities are endless, and the most important ingredient is enthusiasm!
We truly hope you and your little ones have a blast trying out these activities. Remember, the goal is to have fun and make memories, so don’t worry about perfection. Embrace the mess, celebrate the successes, and enjoy the delicious outcomes. We can’t wait for you to experience the joy of cooking together!
Frequently Asked Questions:
What if my child has allergies?
It’s always important to be mindful of allergies. Before you begin any recipe, carefully review the ingredient list. Most of these Kids in the Kitchen: Activities Edition recipes are quite adaptable. For example, if there’s a dairy allergy, explore using plant-based milks or yogurts. For gluten sensitivities, seek out gluten-free alternatives for flours and breads. Always consult with a healthcare professional regarding specific allergy concerns and appropriate substitutions.
How can I make these activities even more educational?
Beyond just following the recipe, you can turn these cooking sessions into learning opportunities. Discuss where ingredients come from, talk about measurements and simple fractions, explore the science behind cooking (like how heat changes food), and encourage them to practice reading the recipe steps. You can also discuss food safety basics in an age-appropriate manner.
My child gets easily discouraged if things don’t turn out perfectly. How can I help?
Focus on the process and the fun! Praise their effort and their willingness to try. If something doesn’t go exactly as planned, frame it as a “happy accident” or an opportunity to be resourceful. You can say things like, “That’s an interesting way to make it! Let’s see how it tastes!” The emphasis should always be on the shared experience and the learning, rather than a flawless final product. These Kids in the Kitchen: Activities Edition are designed for enjoyment!
Kids in the Kitchen: Activities Edition
Engage young chefs with fun and educational kitchen activities designed for all skill levels.
Ingredients
-
Flour
-
Sugar
-
Eggs
-
Milk
-
Butter
-
Vanilla Extract
-
Sprinkles
Instructions
-
Step 1
Activity 1: Cookie Decorating Station. Set out plain cookies and various frosting colors and edible decorations like sprinkles. -
Step 2
Activity 2: “Mystery Ingredient” Challenge. Provide a small selection of safe ingredients and let kids create their own snack combination. -
Step 3
Activity 3: Measuring Practice. Use dry ingredients like flour and sugar to practice measuring cups and spoons. -
Step 4
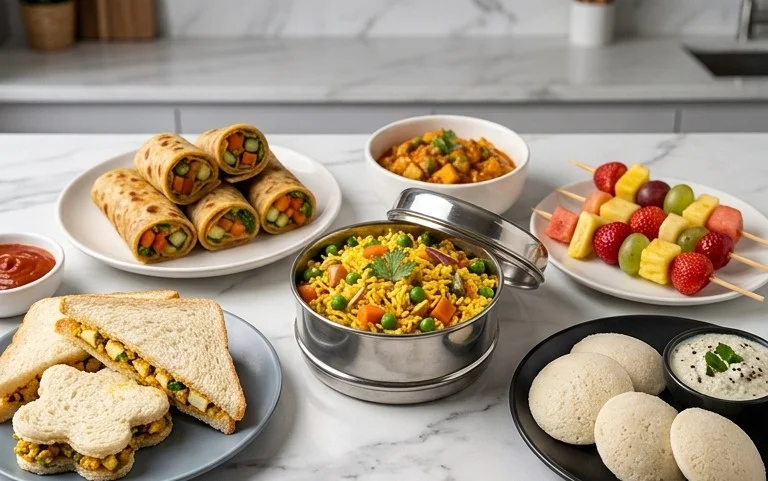
Activity 4: ‘Build a Sandwich’ Bar. Offer a variety of bread, spreads, and fillings for kids to construct their own sandwiches. -
Step 5
Activity 5: Fruit Skewers. Provide pre-cut fruits and skewers for kids to create colorful fruit kebabs. -
Step 6
Activity 6: Kitchen Scavenger Hunt. Create a list of common kitchen tools or ingredients for kids to find.
Important Information
Nutrition Facts (Per Serving)
It is important to consider this information as approximate and not to use it as definitive health advice.
Allergy Information
Please check ingredients for potential allergens and consult a health professional if in doubt.