Pumpkin Oreo Balls – Easy Fall Treat Recipe
Pumpkin Oreo Balls are an absolute fall dream come true, and I’m so excited to share this recipe with you! If you’re anything like me, the moment the leaves start to turn and the air gets a little crisp, your mind immediately drifts to all things cozy and delicious. And for many, that means pumpkin spice everything. But imagine taking that beloved pumpkin flavor and marrying it with the irresistible crunch and creaminess of your favorite Oreos. That’s precisely the magic we’re creating with these delightful Pumpkin Oreo Balls. They’re a perfect no-bake treat that packs an incredible punch of seasonal flavor, making them a guaranteed hit at any gathering or a delightful personal indulgence. What makes these little bites so special is how effortlessly they capture the essence of autumn in every single bite, offering a delightful textural contrast and a sweet, spiced perfection that will have everyone begging for the recipe.
Why You’ll Love These Pumpkin Oreo Balls
The Ultimate Fall Indulgence
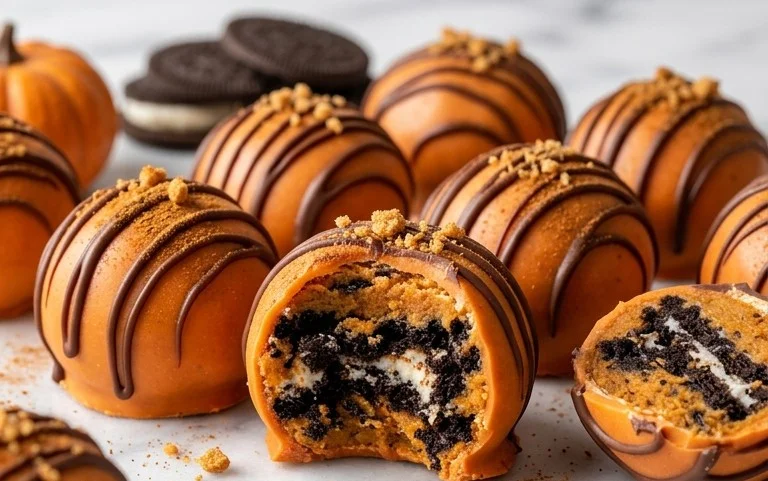
Pumpkin Oreo Balls
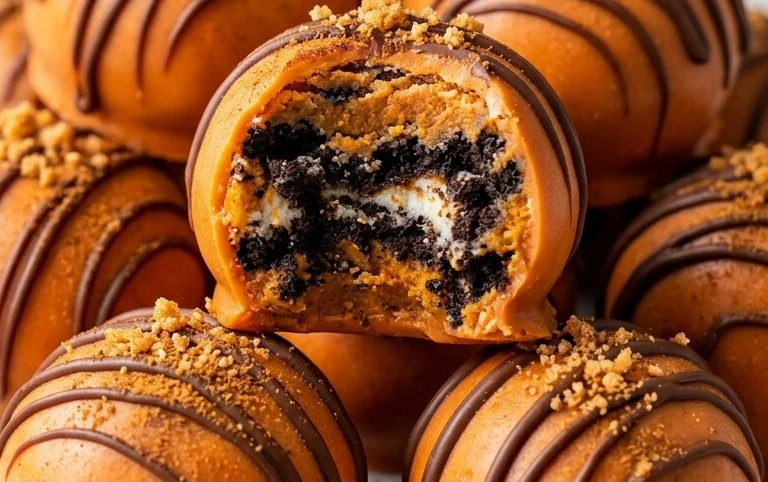
These Pumpkin Oreo Balls are an absolute dream! Imagine the classic, beloved Oreo cookie, infused with the warm, comforting flavors of pumpkin and spice, all enrobed in a smooth, decadent coating of orange candy melts. They’re the perfect treat for fall gatherings, Halloween parties, or just when you need a little pick-me-up that tastes like autumn in every bite. They’re surprisingly simple to make, making them a fantastic option for bakers of all skill levels. Plus, they look so festive! The vibrant orange of the candy melts really makes them pop, and you can even add a little extra flair with some festive sprinkles if you’re feeling ambitious. Trust me, once you try these, they’ll become a staple in your holiday baking repertoire.
Ingredients:
Instructions:
Start by preparing your Oreos. You’ll want to crush them into fine crumbs. The easiest way to do this is to place the entire 36 Oreo cookies (filling and all!) into a food processor and pulse until they are finely ground. If you don’t have a food processor, don’t worry! You can also place them in a sturdy zip-top bag, seal it tightly, and then use a rolling pin or the bottom of a heavy pan to crush them. The goal is to get them as close to a sandy texture as possible. It’s important to get them really fine so they incorporate smoothly with the cream cheese. Small chunks of cookie are okay, but we want to minimize them for the best texture. Once crushed, set the crumbs aside in a medium-sized bowl.
Next, it’s time to introduce the cream cheese. Make sure your cream cheese is truly softened; this is crucial for achieving a smooth, well-combined mixture. If it’s too cold, it will be lumpy and difficult to work with. You can leave it on the counter for about an hour, or microwave it in short bursts (10-15 seconds at a time) until it’s pliable but not melted. Add the softened cream cheese to the bowl with the Oreo crumbs. Using a sturdy spatula or your hands (which is often the easiest and most effective way for this part!), thoroughly combine the cream cheese and the Oreo crumbs. Mix, mix, mix until there are no streaks of cream cheese visible and you have a uniform, dough-like consistency. This mixture will be slightly sticky, and that’s exactly what we’re looking for. It should hold together when you press it.
Now comes the fun part: forming the balls! Take small portions of the Oreo and cream cheese mixture and roll them between your palms to form uniform balls, about 1 inch in diameter. This recipe will yield quite a few balls, so be patient and try to make them as consistent in size as possible. Uniformity helps with even coating later. As you roll each ball, place it on a baking sheet lined with parchment paper or wax paper. This prevents them from sticking to the tray. If the mixture feels too sticky to handle, you can chill it in the refrigerator for about 15-20 minutes before rolling. This will make it much easier to work with.
Once all the balls are rolled and on the baking sheet, it’s time to get them ready for their sweet coating. Place the entire baking sheet into the freezer for at least 30 minutes, or until the balls are firm to the touch. This chilling step is very important because it helps the balls hold their shape when you dip them into the melted candy. If they’re not firm enough, they might start to crumble or deform as you dip them, which is not ideal for a smooth, professional-looking finish. Freezing them ensures they’ll maintain their perfect little sphere shape.
While your Oreo balls are chilling, prepare your candy melt coating. In a microwave-safe bowl, melt the 12 oz of orange candy melts. Microwave them in 30-second intervals, stirring well after each interval, until they are completely smooth and fluid. Be careful not to overheat them, as they can burn easily. You want a nice, pourable consistency. Once melted, remove the Oreo balls from the freezer. Dip each firm ball into the melted orange candy melts using a fork or a toothpick. Allow any excess chocolate to drip back into the bowl. Place the coated balls back onto the parchment-lined baking sheet to set. You can use two forks to help gently slide them off, or a toothpick you can leave embedded for now. For an extra festive touch, you can drizzle a little extra melted candy melt over the top of the coated balls once they’ve started to set, or sprinkle them with some fall-themed sprinkles before the candy coating hardens completely. Allow the candy melts to set completely at room temperature, or speed up the process by placing the baking sheet in the refrigerator for about 10-15 minutes.
Conclusion:
These Pumpkin Oreo Balls are an absolute dream for any fall lover! They’re incredibly easy to whip up, requiring no baking and minimal ingredients, making them the perfect last-minute treat or a fun activity to do with family. The delightful combination of classic Oreo flavor with warm, cozy pumpkin spice is simply irresistible. They offer a perfect balance of sweetness and festive spice, and their delightful creamy texture is sure to please everyone.
I love serving these as part of a dessert platter during autumn gatherings, alongside apple cider or a warm chai latte. They also make fantastic edible gifts for friends and neighbors. Don’t be afraid to get creative with variations! You could try adding a pinch of nutmeg or ginger to the cream cheese mixture for an extra spice kick, or dipping them in dark chocolate for a richer flavor. Perhaps even swirl in some caramel before rolling them into balls!
I truly encourage you to give these Pumpkin Oreo Balls a try. They are a guaranteed crowd-pleaser and such a joy to make and share. I’m confident you’ll fall in love with this festive treat as much as I have!
Frequently Asked Questions:
Can I make these ahead of time?
Absolutely! Pumpkin Oreo Balls can be made up to 3-4 days in advance and stored in an airtight container in the refrigerator. This makes them ideal for holiday parties or busy weeks.
What’s the best way to store leftovers?
Store any leftover Pumpkin Oreo Balls in an airtight container in the refrigerator. They will maintain their best texture when kept chilled.
Can I use a different type of Oreo?
While the classic chocolate Oreo is traditional, you could experiment! However, the pumpkin flavor might be best complemented by the original chocolate cookie base to keep the focus on the pumpkin spice element. Some have had success with Golden Oreos, but the chocolate ones provide the most classic taste.
Pumpkin Oreo Balls
Delicious no-bake treats made with crushed Oreos, cream cheese, and coated in orange candy melts, perfect for fall celebrations.
Ingredients
-
36 Oreo cookies
-
8 oz cream cheese, softened
-
12 oz orange candy melts
-
1/4 teaspoon pumpkin pie spice
-
1/2 teaspoon vanilla extract
-
Optional: Pumpkin sprinkles for garnish
Instructions
-
Step 1
Crush the Oreo cookies into fine crumbs using a food processor or by placing them in a zip-top bag and crushing with a rolling pin. -
Step 2
In a medium bowl, combine the Oreo cookie crumbs and softened cream cheese. Mix until well combined and a dough-like consistency forms. -
Step 3
Stir in the pumpkin pie spice and vanilla extract until evenly distributed. -
Step 4
Roll the mixture into small balls, about 1-inch in diameter. Place them on a baking sheet lined with parchment paper. -
Step 5
Melt the orange candy melts according to package directions, typically in the microwave in short intervals or using a double boiler. -
Step 6
Dip each Oreo ball into the melted candy melts, ensuring it is fully coated. You can use a fork or a toothpick for dipping. -
Step 7
Place the coated Oreo balls back onto the parchment-lined baking sheet. If desired, add pumpkin sprinkles immediately before the candy coating sets. -
Step 8
Refrigerate the Oreo balls for at least 30 minutes, or until the candy coating is firm.
Important Information
Nutrition Facts (Per Serving)
It is important to consider this information as approximate and not to use it as definitive health advice.
Allergy Information
Please check ingredients for potential allergens and consult a health professional if in doubt.